Getting Started
-
Create a new Google account or choose an existing one, as you prefer.
-
Right-click the button below, choose "Open in New Tab", and sign in.

-
Accept all Terms and Conditions as necessary.
-
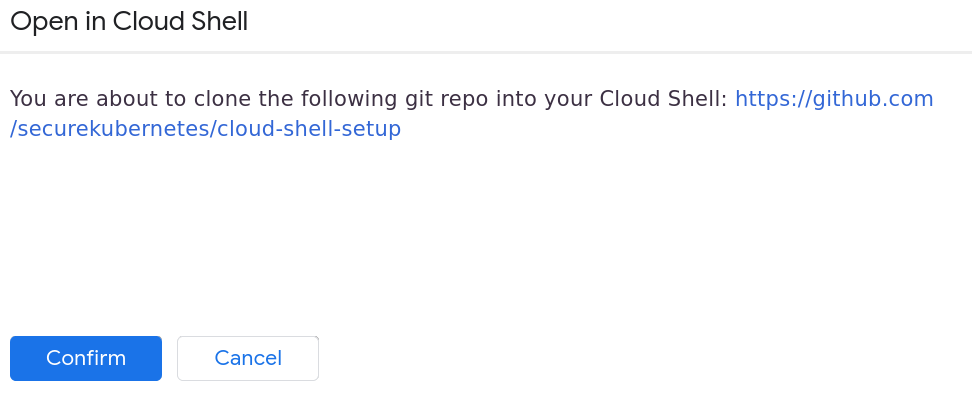
Click "Confirm" if prompted to clone the git repo into your Cloud Shell. It may look like this:
-
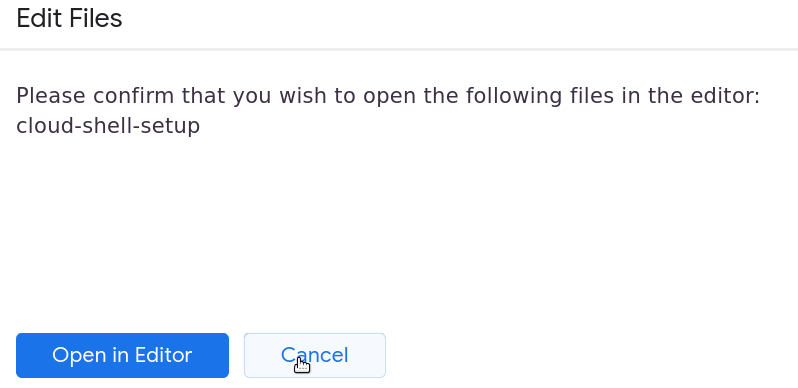
Click "Cancel" if prompted to open the code editor. It may look like this:
-
If the Google account has not had Billing set up yet, click "Activate" on the free trial banner and step through the workflow to sign up for the free trial.
-
Once inside the Cloud Shell terminal, run setup.sh. This should create a new Project with a single-node Kubernetes cluster that contains the prerequisites for the workshop:
The script will prompt you for a project name (just hit enter to accept the default) and a password for your webshell instances../setup.sh -
When the script is finished, verify it worked correctly.
kubectl get pods --all-namespaces
The output should look similar to this:
$ kubectl get pods --all-namespaces
NAMESPACE     NAME                                         READY   STATUS    RESTARTS   AGE
dev           app-6ffb94966d-9nqnk                         1/1     Running   0          70s
dev           dashboard-5889b89d4-dj7kq                    2/2     Running   0          70s
dev           db-649646fdfc-kzp6g                          1/1     Running   0          70s
...
prd           app-6ffb94966d-nfhn7                         1/1     Running   0          70s
prd           dashboard-7b5fbbc459-sm2zk                   2/2     Running   0          70s
prd           db-649646fdfc-vdwj6                          1/1     Running   0          70s
If it looks good, move on to Scenario 1 Attack.